Local Mum Beka Cohen is blogging for us about upcycling and creating something beautiful and practical out of everyday objects. Easy, crafting fun from a hugely talented mum!
Learning how to knit
There is a crafting trend sweeping the country, and for a while now, all fuddy-duddyness has been banished from the art of knitting. Although I learned to knit as a child, that was quite a while ago now (ahem!) and I was really keen to take it up again after blogging about some beautiful patterns I found online, as well as receiving some truly gorgeous hand-knitted items following the birth of my kids. I am lucky enough to have a Gill-Gran, who is constantly knitting stunning cardigans and jumpers for the girls (click here for an photo of the owl jumper she made for my one-year old last month). But while basic knit and purl is fine, to be honest, the idea of creating a beautiful jumper or hat or pair of socks seemed a bit beyond me.
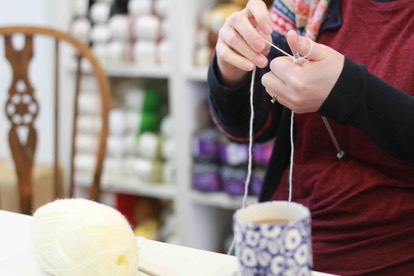
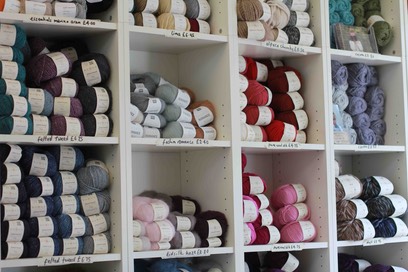
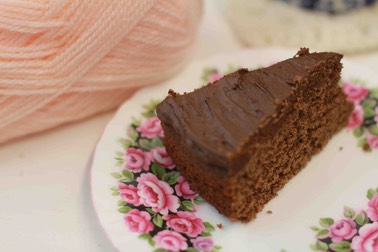
And so when I discovered The Knit Club in Caterham, I was immediately smitten with the thought of going along to one of the knitting workshops on offer there. I headed over last weekend with two best friends for a couple of hours of kid-free chatter over a pair of knitting needles and a cup of coffee. What a clever idea: the shop is stacked with colourful wools of all kinds, cute examples of snoods and stoles draped over vintage dressers and contemporary shelves full of buttons and books. Running down the middle of the shop is a large table surrounded by retro chairs and covered in patterns, wool, mugs of steaming tea and chocolate cake on petal print plates, all of which is presided over by Louise, who set the whole thing up two years ago and has already won awards for her local independent business.
Now what I'm about to show you is neither accomplished nor technical - those Carshalton Mums who already knit will not be impressed! But this blog post is all about getting stuck in, even if you're starting from scratch like me. The point is, anyone can create something lovely from a ball of soft wool and some needles (both of which come free with the class by the way). And in the process, you can have fun, relax and connect with an age-old skill that crosses generations, linking mums and grans and sisters and babies across the world.
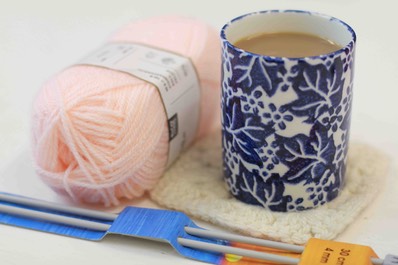
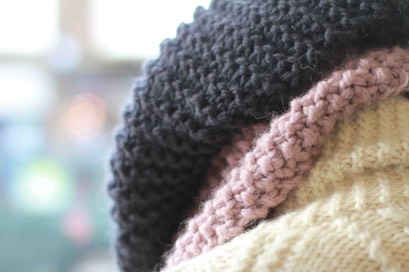
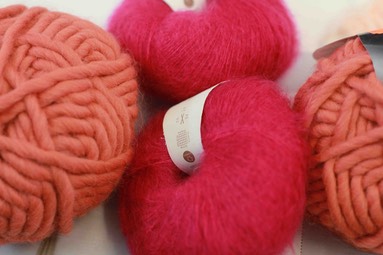
The Knit Club's beginners class is all about reminding you of the basics and nurturing the desire to want to knit more at home, and Louise is the perfect tutor - calm, kind, encouraging and full of praise. Once you've spent two hours gaining confidence in a small group, you leave the shop laden with wool and ideas, raring to go. I've already made a start on a basic snood knitted in thick, bouncy coral wool and a gossamer cowl scarf knitted on circular needles from bright lipstick pink silky yarn (see the photo below). I would never have believed it would be possible, but hopefully with a bit more practise I'll be confident enough soon to join the Hooky Knitters in Carshalton, who meet fortnightly in The Sun. In the meantime, here are a few pictures of what I got up to, and some useful links to get you started.
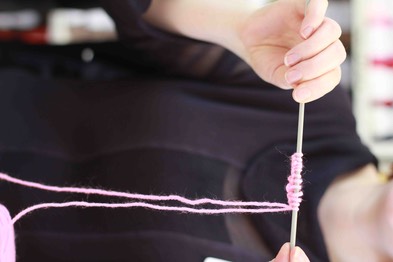
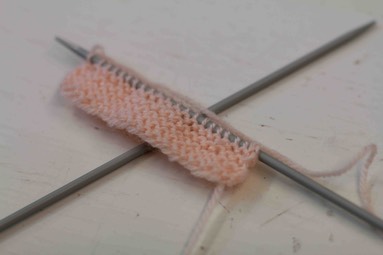
Let's start at the very beginning ... or in other words, "casting on":
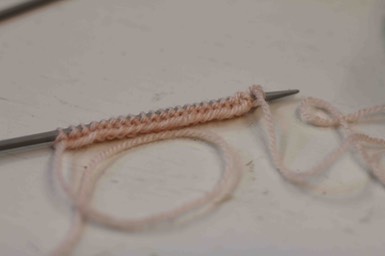
Keeping it real ... learning the knit stitch:
Mixing it all up ... adding the "purl" stitch:
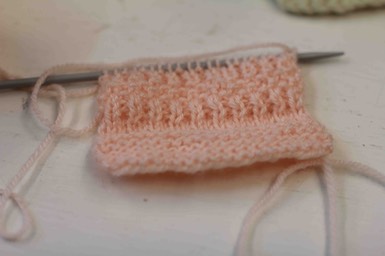
Mmmm, this picture speaks for itself:
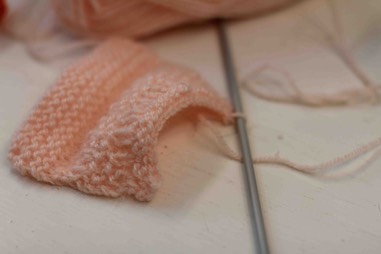
The end is in sight ... casting off:
A selection of yarn I could not leave the shop without (and there is a 15% discount after your course on any items you purchase there and then. Dangerous!):
Some useful links:
The Knit Club - www.theknitclub.co.uk
Maxime Wools (another local wool shop in Carshalton Beeches) - www.maximewools.co.uk
Hooky Knitters - www.facebook.com/groups/Hookyknitterscarshalton
The Sun - www.thesuncarshalton.com
Kate Davies Designs (a fab knitting blog) - www.katedaviesdesigns.com/designs
February 10th
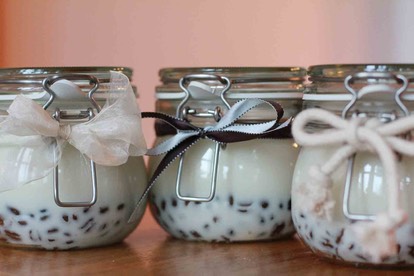
Coffee candle in a jar
The idea of crafting can be a bit off-putting, time-consuming and fiddly. But the best advice I can give you is to get stuck in, don't get hung up on the details, and most of all, have fun. When I'm concentrating on melting wax, straightening wicks or tying the perfect bow around a candle as a present for a good friend, I am completely absorbed in the task at hand, and all thoughts of work stress are banished.
This is a project you can create in the comfort of your own kitchen, using non-toxic ingredients, and on a budget too. The whole thing takes only a few hours and the end result is pretty impressive - perfect for gifts, or as an indulgent treat for dark winter nights.
Moreover, you can customise your candle to suit your own ingredients: the one I'm going to show you how to make here is a coffee-scented candle (using some old coffee beans I had lying around and wanted to use up instead of throwing away). But I've also made the same candle with a rose scent, using roses from a beautiful birthday bouquet dried in the airing cupboard, and even a rosemary-scented version from a few dried sprigs in my garden.
I've yet to try a lavender candle, but living where we do, there really is no excuse: grab yourself a bunch of fresh or dried lavender from Mayfield Lavender or Carshalton Lavender, pick up some organic essential lavender oil from Naturally Thinking in Carshalton, and get started. Here's what you'll need:
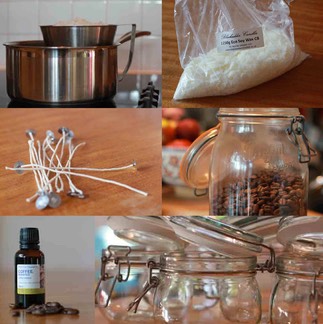
Ingredients and equipment
A pan of water (any normal pan will do, and don't worry if the wax spills into it: soy wax scrapes off easily and the residue can be washed away with warm water and soap)
A metal jug to sit in the pan (this is where you'll melt your wax; like chocolate, soy wax needs to be melted in a bain marie)
Soy wax flakes
Wicks (preferably pre-waxed cotton wicks with sustainers)
Skewers/pens/lolly sticks and elastic bands to secure the wicks during cooling
Coffee beans
Pure essential coffee oil
A Kilner-style jar (or any glass container that will show off the coffee beans)
Ribbons or cords to decorate the jar
Method
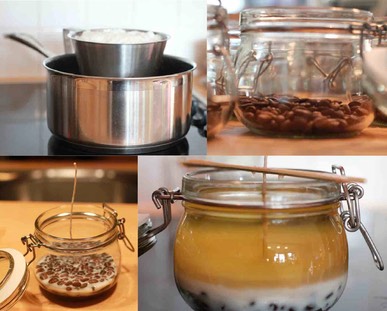
Pour the grated soy wax into your metal jug and place the jug into a pan of simmering water.
Stir until the wax is melted and fluid. Keep adding wax until the melted wax level matches your pre-measured volume (see 'Tips' below).
Meanwhile, using two skewers or lolly sticks secured at the ends with elastic bands or selloptape, sit your wick in place in the middle of a clean dry jar (I used these 0.5l jars with a hinged lid and rubber seal from Ikea as they are cheap and easy to get hold of. But you could upcycle an existing Kilner jar from your pantry, or a standard jam jar).
Pour the coffee beans into the jar, around the wick, to a level height of around 2-3cm.
At this point, return to your melted wax and add a good dollop of your pure essential oil. It's important to use good quality pure essential oil so that the wax is scented but not tainted with other synthetic ingredients. And don't err on the side of caution: add enough oil so that you can smell the coffee, but not until you're about to pour the melted wax out - otherwise the scent will evaporate before the wax is cooled.
Making sure your wick is still in place, carefully pour the scented melted wax into the jar until the beans are barely covered. Then stop! This step is important - if you fill the jar with wax in one go, the beans will float around and rise to the top. You need the beans to stay secured at the bottom of the candle as they will smoke and smell if they come into contact with a flame.
Leave to set for around 30 minutes to an hour (have a cuppa!).
Keep the remainder of your wax warm in the pan, and when you're ready, pour it into the jar until it reaches a level you're happy with.
Keep the wick in place and leave to cool, away from heat but not in the extreme cold - this will cause the wax to crack and pull away from the sides of the glass.
Once fully cooled (I left mine overnight), you can trim the wick and voila, your candle is ready. I decorated mine with ribbon tied around the outside, but also placed a couple of dried rose heads or sprigs of rosemary into the candles I made to match those scents. Basically just get creative at that point!
Tips
Before you get started, it's useful to fill your container with water to the level at which you'd like the wax to sit. Then pour this water into your melting jug and make a mental note of the level. This will help you to gauge how much wax you need to melt for each candle - it's a bit hard to measure the volume otherwise, as the wax comes coarsely grated, and it is preferable to fill one container at a time to avoid any layering or difference in colour or texture.
Don't let the candle burn down below the level of the coffee beans as this will cause the beans to smoke and smell, and could be a fire risk.
As there is hot wax involved, I prefer to make these candles once all the kids are safely asleep or out of the house.
Keep your jars at room temperature to avoid any excess cracking as the wax cools.
I tried securing the wick to the bottom of the jar with a splodge of glue. Although this worked well, the sustainer (metal base) of the wick rusted a little and this was visible through the bottom of the jar.
Sourcing supplies - I always aim to find as many ingredients as I can from local shops and businesses, but sometimes you need to look further afield for the more obscure items. I bought my soy wax, wicks and coffee essential oil online. The jug and jars are from Ikea.
A note about soy wax: it is a natural sustainable product made from soy beans and burns at a lower temperature than paraffin-based wax, making candle-burning safer. No paraffin also means less sooty residue, while a slower burn makes a smaller amount of wax go further (a small 4 oz soy wax candle can last up to 20 hours). More absorbency means soy works better with fragrance oils and gives a better scent throw when burning, and even when not lit.
Finally, if the scent of this candle is not enough of a caffeine hit for you, may I recommend a trip to Bailey's Deli in Carshalton Beeches, and a cup of their amazing flat white coffee - bliss!
Beka Cohen

"One of my New Year's resolutions is to blog a bit more about the crafty bits and bobs I get up to. I love all things quirky, pretty, unique but also local. In my free time (ahem!) I also edit art books, write articles and work as a freelance social media consultant, so crafting is a way to put all that to one side and indulge in my love of upcycling and creating something beautiful and practical out of everyday objects, ideally sourced locally and in a way so as to sustain and nurture local businesses.
I have loads of ideas for blog posts including easy soy candles, no-sew tutus, homemade notebooks and wax crayon sets, upcycled cardboard drawers, and many, many more! Each blog post will be aimed at time-hungry mums (or dads) who are up for some basic crafting fun, using straightforward language and illustrated with a few photographs. There will be easy to follow tips and advice, as well as links to other interesting sources and most importantly, addresses, contact details and embedded links to local suppliers or services."
Beka is mum to Maeve (3) and Flora (nearly 1) and when she is not crafting, threading her sewing machine for the umpteenth time, rummaging in charity shops for vintage bargains or dreaming of fish and chips in her hometown of Whitby, can also be found blogging about owls and pears. You can follow her news on owlsandpears.com, or via twitter (@owlsandpears) and Facebook too. If you like what you read, or would like to make a suggestion or request a feature, don't be shy, get in touch!